- 538")


Deliver to
Columbus Free Shipping
Delivery byThursday, April 24, Order within
Free Shipping
Delivery byThursday, April 24, Order within
Shipped By: AliExpress
 Fast Delivery
 Security & Privacy
 FREE Return
Compatibility:Raspberry Pi 5B / 4B / 3B+ / 3B / 3A+ / 2B / 1B+ / 1A+If there are display issues, simply modify the configuration file to rectify them.…
Compatibility:
Raspberry Pi 5B / 4B / 3B+ / 3B / 3A+ / 2B / 1B+ / 1A+
If there are display issues, simply modify the configuration file to rectify them.
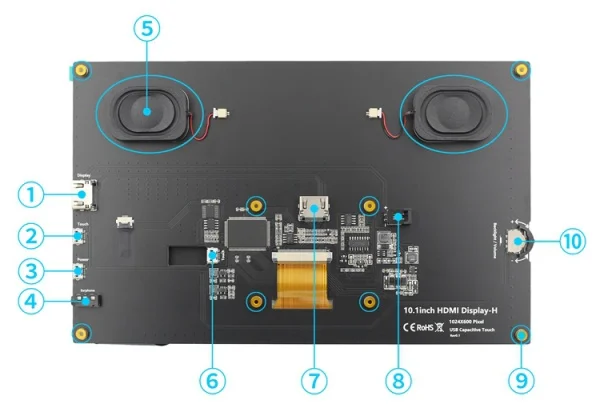
Screen Specifications:
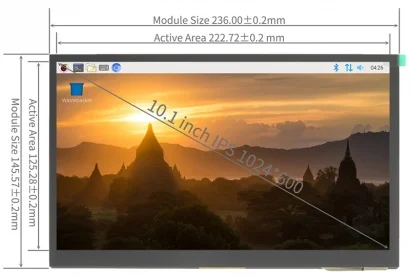
Size: 10.1 inch
Resolution: 1024*600 pixels
Screen Type: IPS
Touch Type: 5-point capacitive touch
Brightness:220 cd/m²
Interface: HDMI
Touch IC: GT9271
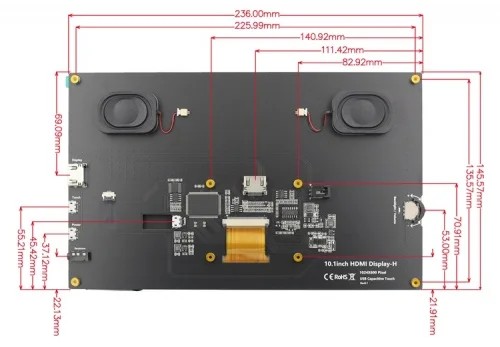
Active Area: 222.72*125.28 mm
Outline Size: 236.00*145.57 mm

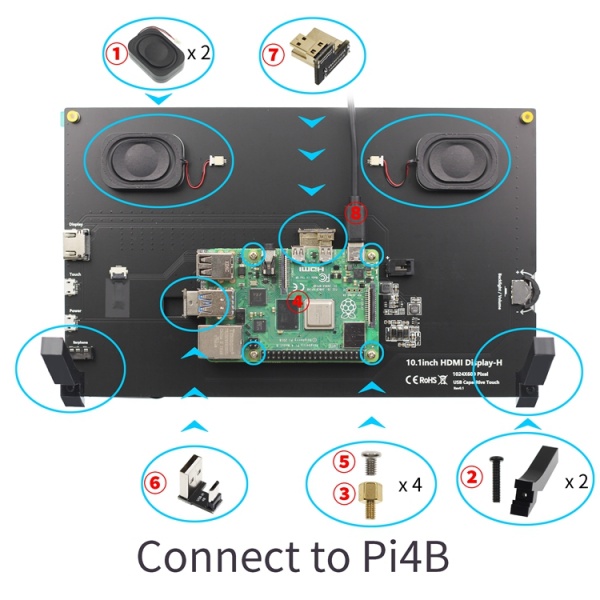
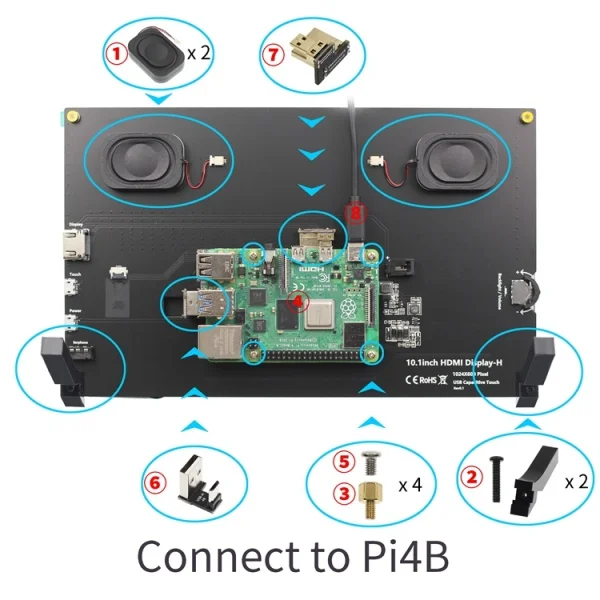
1 x 10.1 Inch Display
1 x HDMI to HDMI Cable
1 x Micro-USB to USB Cable
1 x Dual Speakers
1 x Micro-HDMI Adapter (For RPI 4B)
1 x USB-Micro Adapter (For RPI 5/4B)
2 x Display Stand
8 x Screws
1 x Installation kit
1 x Micro-HDMI Adapter (For RPI 5/3B)
1 x USB-Micro Adapter (For RPI 3B)
Cetifications:


")
500+ Sold

")
500+ Sold


500+ Sold


500+ Sold